This is the final part of a multi-step instructional series written by Kathy Przywara, our recipe coordinator and a leader of our Food & Cooking support team. Be sure to read the first step, which provides tips on how to remove your cake from the pan and cool the cake, and the second step that details how to layer and fill your cake.
Crumb Coat Your Cake
Crumb coating means to apply a thin layer of thin consistency frosting to the entire surface of the cake to seal in the crumbs. This is also your chance to even things out if you have some minor imperfections. Usually this is done with the same frosting you will use as your final frosting. In all, you will need about 3 cups of buttercream type frosting to fill and frost an 8" round cake.
To start your crumb coat, remove about a cup or so of your frosting to a separate bowl. This is to keep your main frosting "clean" and crumb free. We are not going to worry about any crumbs that get into this crumb coat frosting. You want thin consistency buttercream for this because that will be easily spreadable and less likely to tear the outside of the cake off. If your frosting is too stiff, add liquid a teaspoon at a time until you get a smooth, easily spreadable frosting.
The best frosting tools are long, straight, metal spatulas. These come in two types - straight or offset. This really is an essential tool that is hard to improvise if your goal is a smooth frosting. If your goal is slathering your cake with your yummy frosting and making swirls as decoration, any kind of knife will do for the final coat but for the crumb coat, the straighter the better because you want just a thin coat. If you do need to improvise, find something fairly stiff with a nice straight edge. A table knife generally will not do a very good job here. I like to use a dough/board scraper. This will make short work of frosting the sides because it has a right angle at the bottom that you can hold against the cake board and cake then just turn your cake! Another option is an inexpensive spackling blade from the paint section of the hardware store. The plastic ones are fine. Just make sure to use a new one and wash it first! Make sure it is clearly designated as "food only."
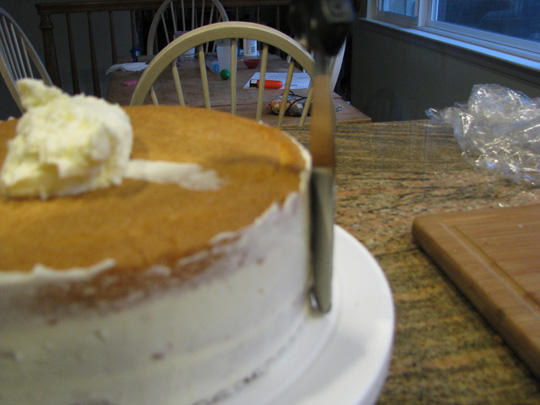
Start with the sides of the cake. Take some frosting on your spatula and spread it on the side. Get down to the bottom to make sure you seal the cake to the board. Don't worry if it's a little messy. When applying frosting, make sure to keep the spatula "in" the frosting. If you slide off the edge of the frosting onto the cake part, you are more likely to lift up crumbs. Likewise, don't lift the spatula straight off as that will likely tear crumbs out of the cake also. So, to minimize this, only slide the spatula off when it's on frosting. When you run out of frosting to spread, slide your spatula off then get another dollop and continue from where you left off. Work your way around the whole cake.
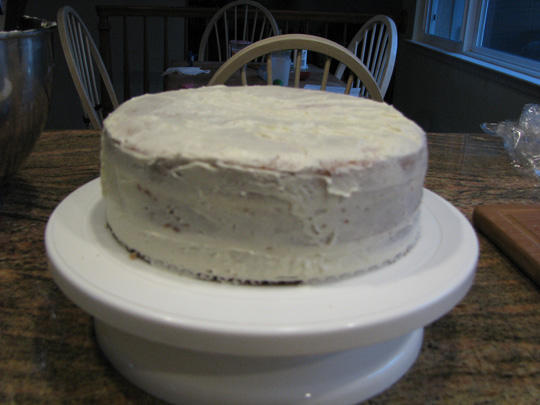
Once all the sides are covered, use your spatula or scraper to even things out. If you are doing a round cake, hold the scraper along the side of the cake at about a 45° angle and slowly turn the cake. This will "drag" the scraper along and even out your coating. It's okay if you can see cake through - this is what you want -just a thin layer that is going to seal things in. It doesn't have to be that fussy. Put any excess frosting back in your crumb coat bowl of frosting.
Frost the top of the cake in the same manner. Put the rest of your crumb coat frosting on the top and start working it to the edges with your spatula remembering to keep the spatula "in" the frosting to minimize crumbs. Drag your scraper/spatula edge across the top to even things out just like you did with the sides. Remove any excess frosting. Once you are done, toss away this crumb-ridden frosting …or better yet, spread some on the leveled off cake pieces and enjoy your reward for a job well done!
When you have your whole cake crumb coated, you can pop it in the fridge for a bit to allow the frosting to set up. Once the frosting is set, you can do your final coat of frosting. This should take no more than 30 minutes to set up the frosting.
If you are covering your cake with fondant or other rolled frosting, you prepare your cake the same way up to this point. You will want to have your crumb coat still wet though so that your fondant will stick to it. Your cake could also be covered in a poured frosting/glaze at this point.
Frosting Your Cake
After your crumb coat has set up, you can finish frosting your cake. One way to apply the frosting is with an icing tip. This is a very large, flat ribbon tip. It requires a large 16" bag and will not fit a tip coupler. So, you basically need a dedicated bag. I generally don't fuss with this because to me, it's one more thing to clean.
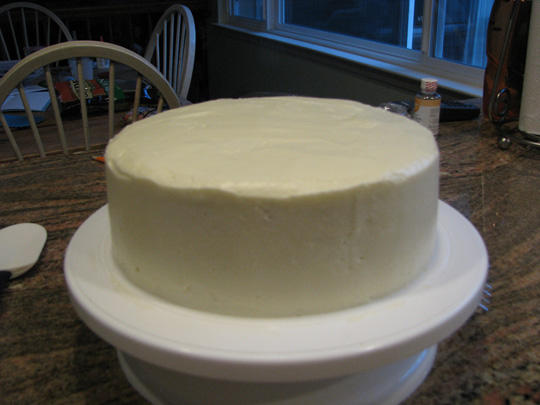
Here is where you will need your flat spatula again. Using more frosting this time, apply it the same way you did for the crumb coat but create a thicker layer. Your goal is straight sides and a level top. Use your spatula to smooth the sides of the cake - hold it perpendicular and slowly spin the turntable. If you get a large build up on the spatula/scraper, clean it off back into the bowl. Keeping the spatula clean is important. If there are air holes or low spots, fill them in with more frosting and then go around again with your straight edge.
When working on the top, scrape over the frosting that sticks up over the edge from smoothing the side. Don't fuss with this too much! You're going to put a border along the edge that will cover it up! Don't become too much of a perfectionist over this or you will drive yourself insane. Nobody but you will notice the imperfections…well, except you! Next time you pass the bakery case at the grocery store, take a good look at the cakes to notice how NOT perfect they are! Smooth and level the top as best you can. Clean your knife off between strokes for best results. You can also warm your knife in hot water and dry it off between each pass. The heat will help to smooth things.
If you are using a crusting type buttercream, allow the frosting to set up and form a skin. Once it is no longer tacky, you can place a sheet of waxed or parchment paper on the surface and gently smooth with a fondant smoother or the palm of your hand.
Decorating
Most times when people think of decorating a cake, they think of roses and leaves and fancy borders. There is more to decorating a cake than frosting roses! If this is your first cake, keep it simple. Don't try to do anything too elaborate! Some simple decorating done well will look much better than trying something elaborate and having it look messy.
Simple ideas:
- Frost your cake with a fluffy frosting and use your knife to create swirls all around. Sprinkle with colored sugars or other types of confetti sprinkles. Another option is to sprinkle the top with shaved chocolate.
- Decorate with safe candies to make a design or picture. Use licorice laces for "writing" a message.
- Get plastic items that go with your theme from the party, craft or toy store. Arrange them on top to create a "scene."
- Use cookie cutters to make an imprint in the frosting. Outline this and fill in with “stars” - frosting piped in with a star tip.
- Use cut out cookies around the side as a border. Match the cookies your theme...use stars or flowers or hearts. Use bunnies and eggs for an Easter cake.
- Make a top and/or bottom border using a star tip to make stars or shells. Use a round tip to make dots.
- Create a "garden" around the bottom using a leaf tip to randomly pipe leaves from the bottom up the sides in varying lengths and directions. Use a star tip with one or more colors of frosting to create "flowers" among the leaves. Use a small round tip with another color to add in flower centers to the stars.
Kathy Przywara is the mother of two children with food allergies and started as a volunteer for Kids With Food Allergies Foundation (KFA), a division of the Asthma and Allergy Foundation of America (AAFA), since it opened as a nonprofit. She is the Sr Community Director for the Asthma and Allergy Foundation of America. Her recipe for Wacky Cake remains one of KFA's most popular recipes.


Comments (0)